
How to Photograph Your Finished Embroidery Projects
A beautifully stitched piece deserves a photo that does it justice. Capturing beautiful photos of your finished embroidery pieces is one of the best ways to showcase the care, creativity, and detail that goes into your stitching. Whether you’re sharing on social media, uploading product photos to your shop, or simply documenting your progress, when you photograph your finished embroidery, it helps others see the true beauty of your work. You don’t need a professional camera or studio setup to take lovely photos. With a few thoughtful choices and some simple techniques, your embroidery can shine just as beautifully in photos as it does in real life.
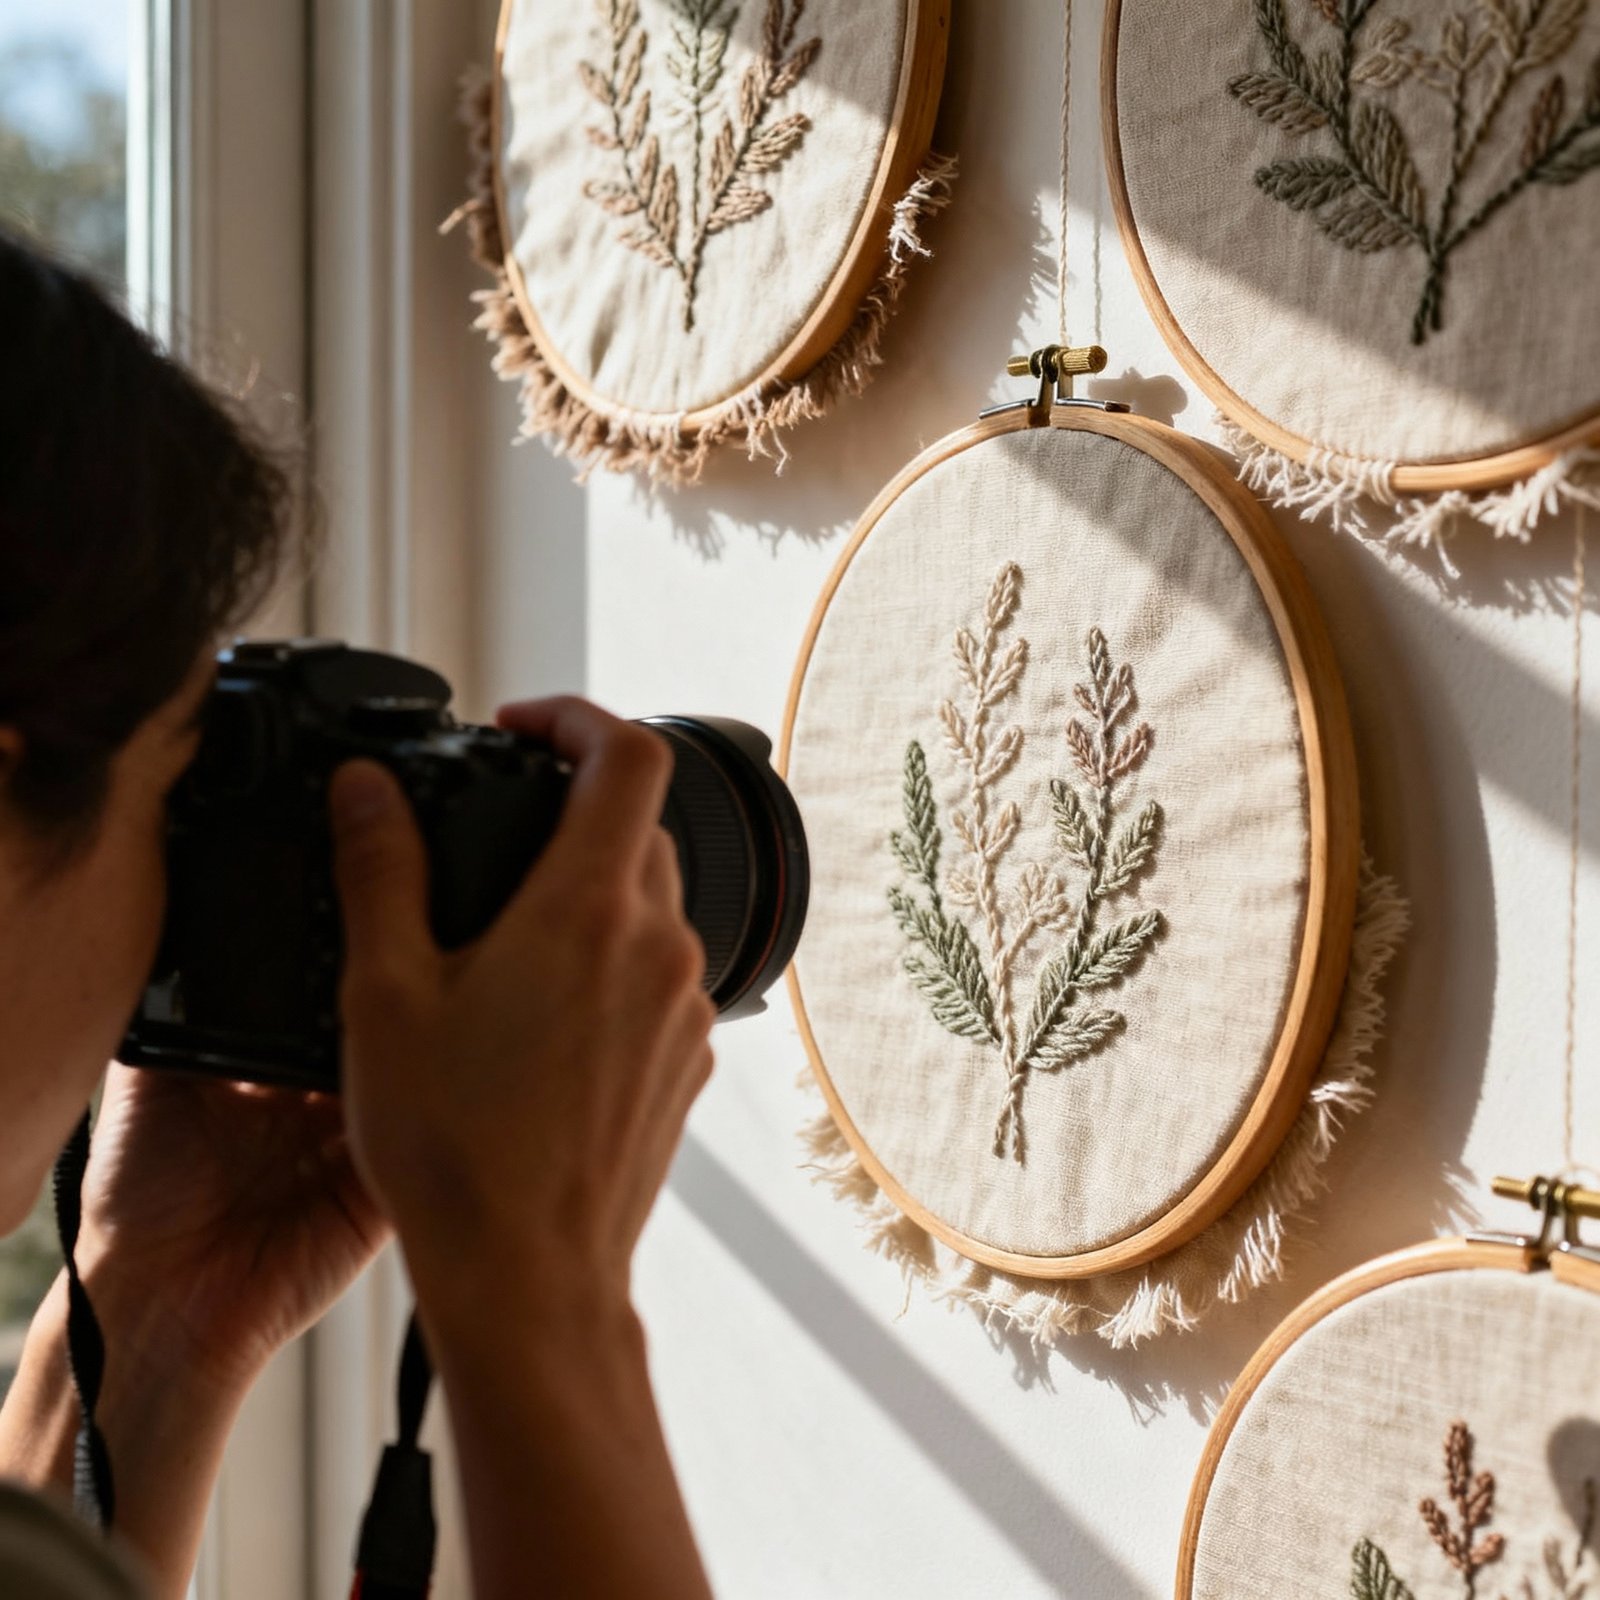
Choosing the right lighting
Lighting is the single most important element in craft photography. The wrong light can dull colours, hide texture, and cast harsh shadows. The right light, however, makes every detail crisp and inviting.
Use natural light wherever possible
Position your setup near a large window with soft daylight. North-facing windows (in Australia) usually offer gentle, even lighting that works well for textiles.
Avoid direct sunlight
Direct sun creates hard shadows and overly bright highlights that can distort thread colour. If the light is too strong, soften it with a sheer curtain, baking paper taped to the window, or by stepping back a little.
When indoors isn’t enough
If your home is dark or the day is gloomy, take your pieces outside to a shaded area – under a veranda, beside a wall, or on an overcast day. Outdoor shade gives a beautifully diffused light that’s ideal to photograph your finished embroidery.
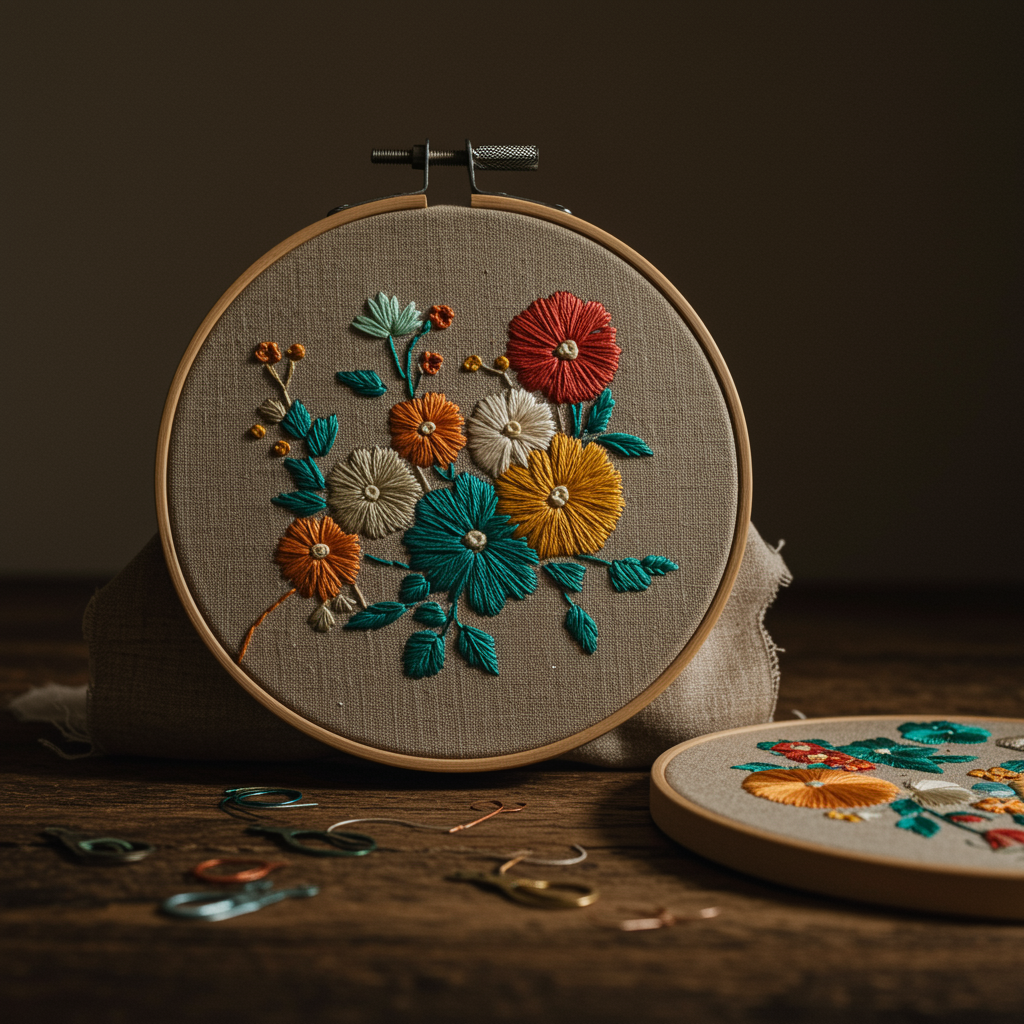
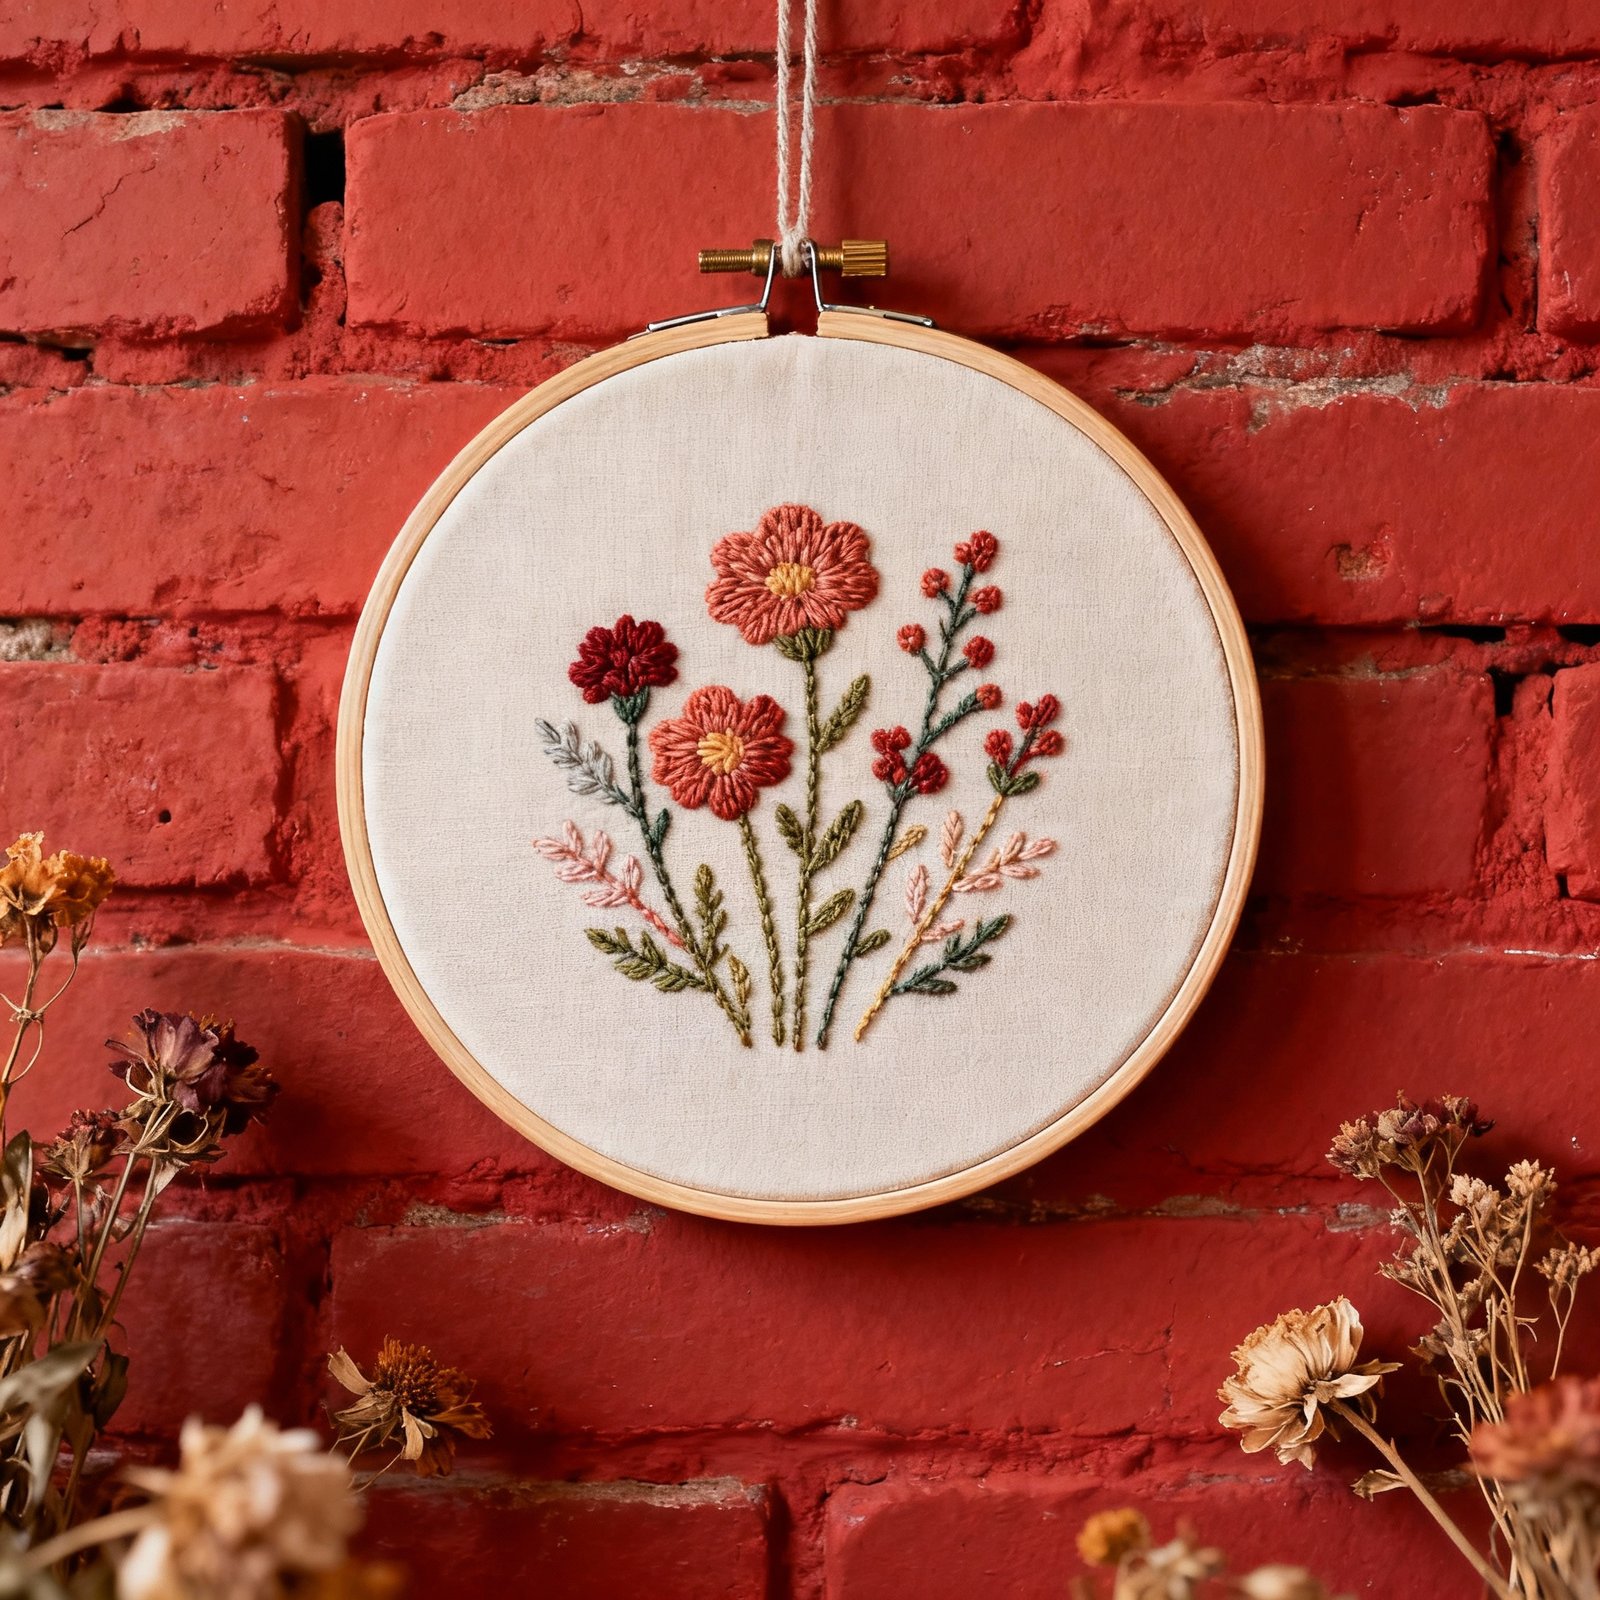
Create a Clean, Simple Background
Your embroidery should be the hero of the photo. A busy background can take attention away from the stitches and make it harder for viewers to focus on the texture and detail.
Neutral backgrounds work best
- white foam board
- a timber tabletop
- a neutral woven fabric
- a flat-coloured wall
- linen or calico cloth
These surfaces keep things calm and allow your colours to stand out naturally.
Keep the palette cohesive
Cool-toned pieces look great on greys and whites, while warm-toned designs pop against timber or cream. Experiment until you find the combinations that feel most like your brand.
Consider Your Styling
Styling adds personality, but it’s easy to overdo. The key is to enhance your embroidery, not overwhelm it.
Use props sparingly
A few well-chosen items can help set the mood:
- the threads you used
- your small embroidery scissors
- a hoop or spare needle
- dried flowers
- a soft plant in the corner
Keep them subtle. Props are there to support your art, not steal the show.
Focus on balance and breathing space
You don’t need to fill every corner of the frame. Leaving some open space gives your viewer’s eye room to rest.
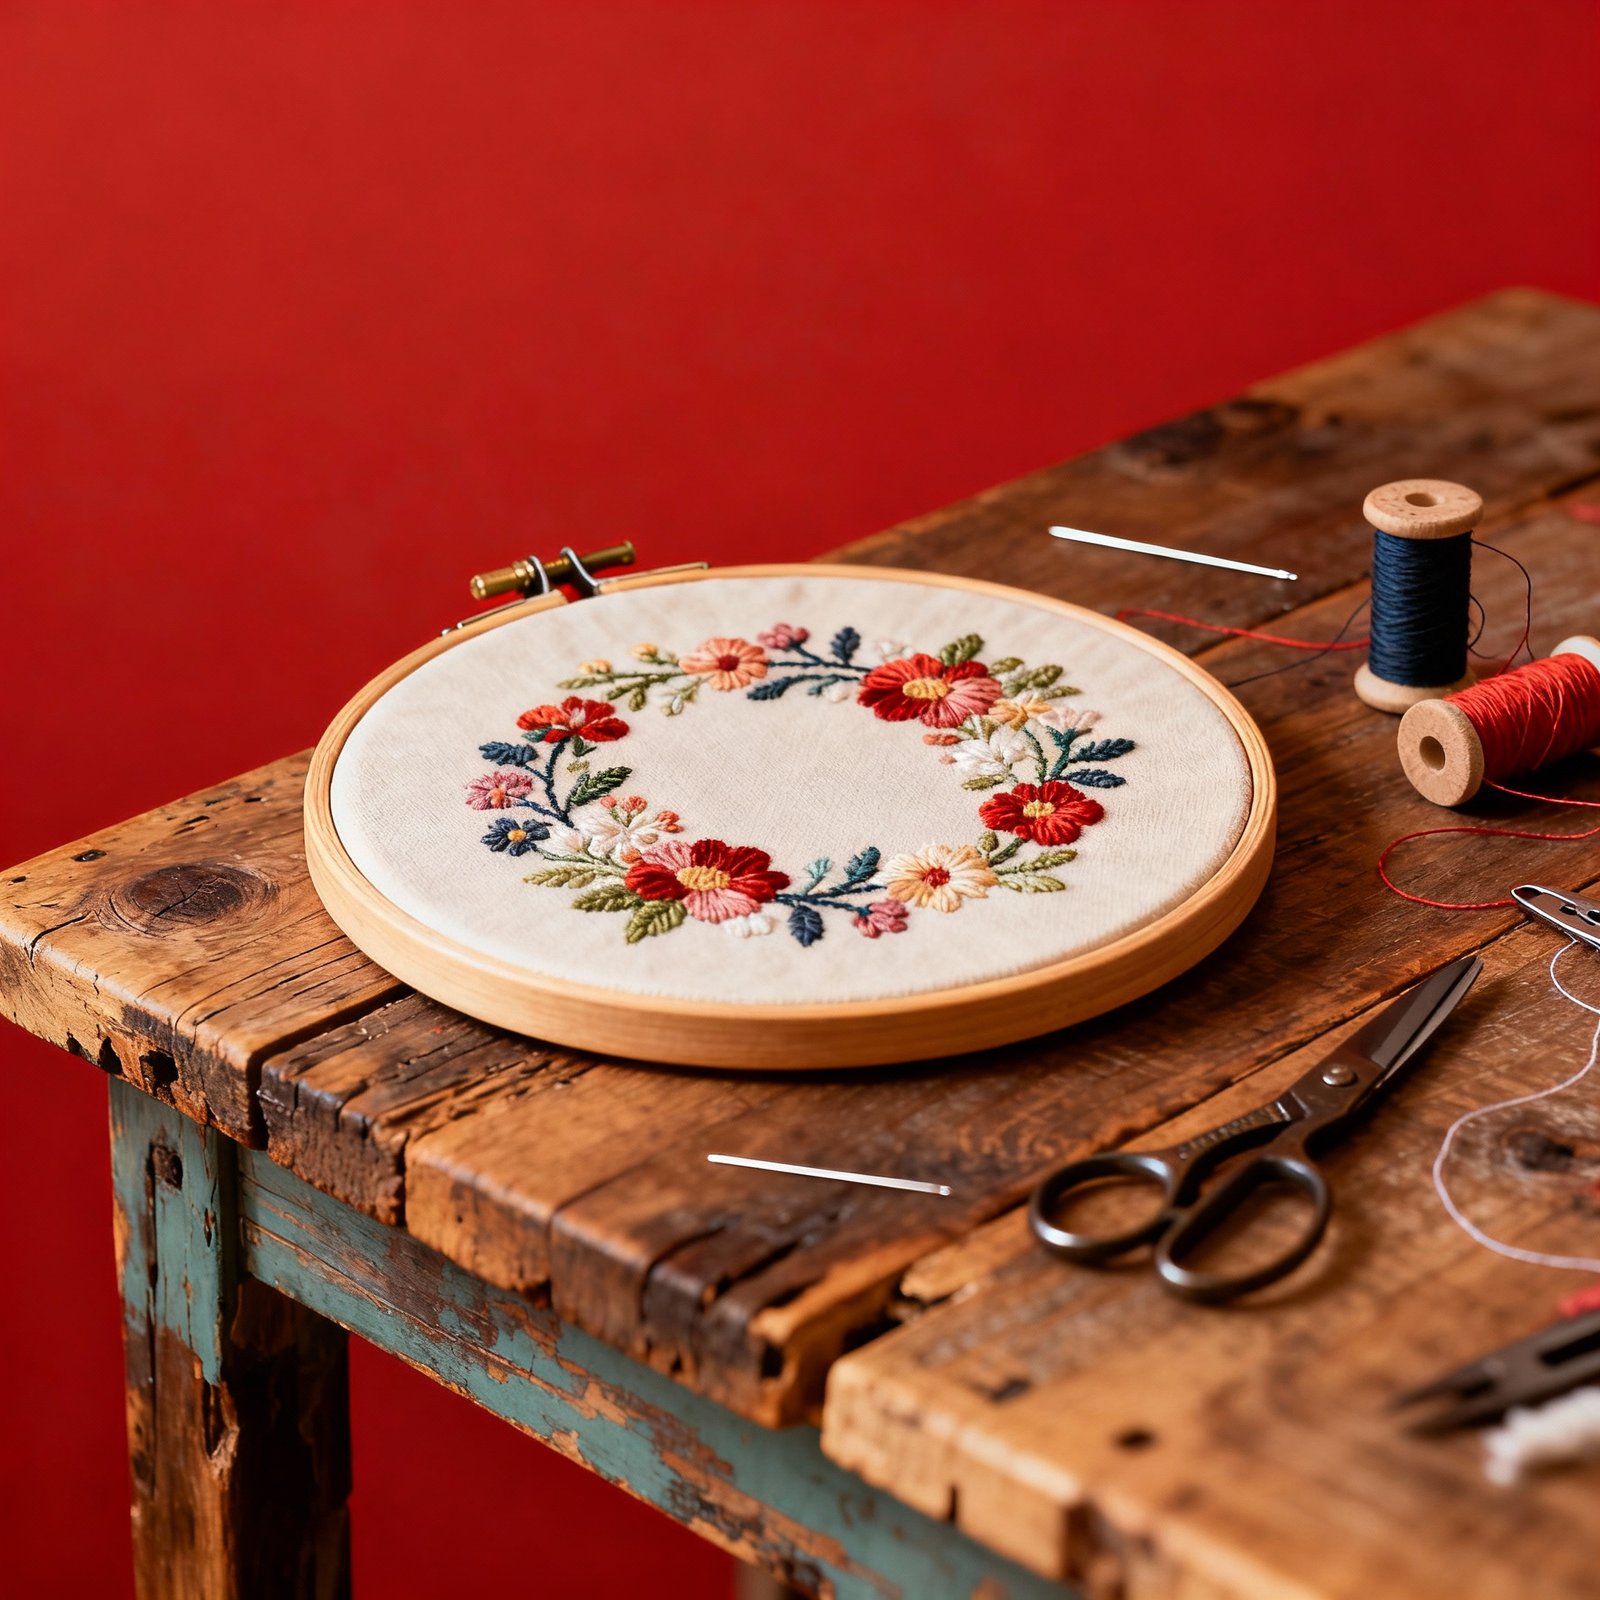
Show the tools behind the craft
People love seeing the materials used to create the piece. Threads twisted neatly beside the work, or your palette of colours fanned out, add context and authenticity.
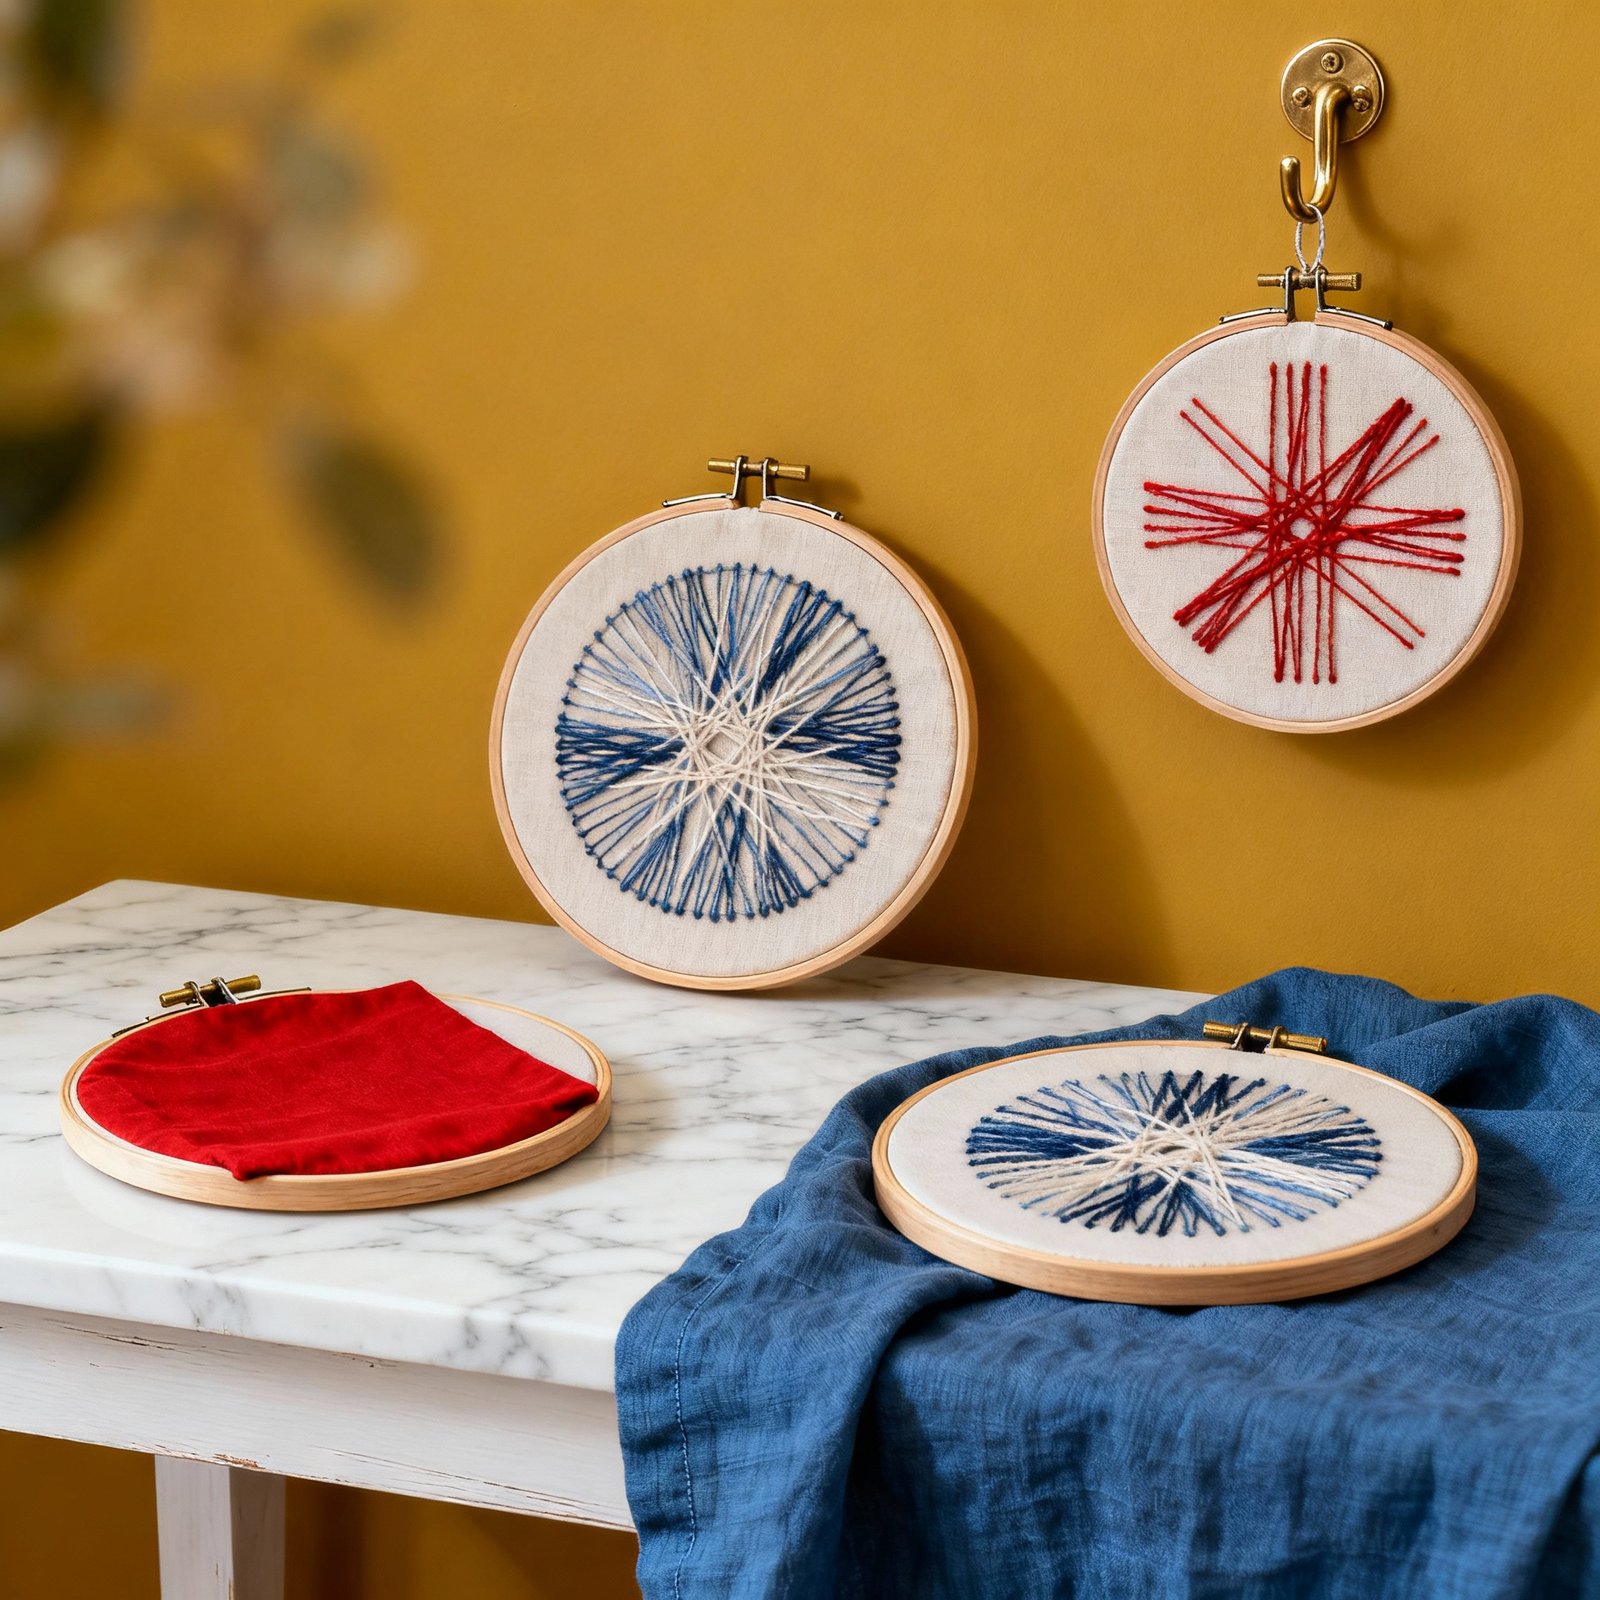
Choose the Best Angles
Embroidery is wonderfully textured and deserves to be shown from more than one viewpoint.
Flat-lay shots
These are ideal for showing the full design clearly. Stand above your piece, hold your phone parallel to the surface, and snap from directly overhead. This keeps the lines straight and the image true to shape.
Close-ups
Zoom in to capture details like shading, French knots, or thread painting. These shots highlight skill and craftsmanship that might otherwise go unnoticed.
Side angles
A slight tilt or angled shot helps show texture — the raised stitches, the depth of satin shading, or beaded accents. It gives viewers a sense of the tactile nature of your work.
In-the-hoop vs out-of-the-hoop
Mix it up. Some designs look beautiful when shown mounted in their hoop, while others shine when lying flat or held gently in your hands.
Use the Tools You Already Have
Most modern smartphones take excellent photos if you give them good light.
Clean your camera lens
It sounds simple, but dust, fingerprints, or smudges can blur your images. A quick wipe makes a big difference.
Keep your hands steady
Rest your elbows on a table, or prop your phone against something stable to avoid blurring. A mini tripod is inexpensive and can improve consistency.
Adjust focus manually
Tap on the area you want the camera to focus on. This ensures your stitches remain crisp.
Don’t use flash
Flash flattens detail and causes bright glare on threads. Natural light always wins.
Edit With a Light Touch
Editing should enhance your photo, not change it dramatically.
Aim for accuracy
Your colours should look the same in photos as they do in real life – especially for digital patterns or shop listings where accuracy matters.
Make small adjustments
Start with minor tweaks:
- slight increase in brightness
- gentle contrast boost
- a touch of sharpness to enhance texture
Avoid heavy filters, excessive saturation, or dramatic colour shifts. Clean, natural editing suits embroidery best.
Tell a Story With Your Photos
Photography isn’t just about showing the finished piece – it’s also a way to share your creative journey.
You might include images of:
- the sketch or outline before stitching
- your colour palette
- mid-progress shots
- your workspace setup
- the finished piece styled for its intended use (e.g. nursery wall, bedroom, or craft room)
Storytelling builds connection and gives your audience a window into your creative world.
Use Consistent Visual Style for Your Brand
If you plan to photograph your finished embroidery as part of your business, consistency helps people instantly recognise your work.
Think about:
- your go-to colour palette
- your favourite backgrounds
- whether you prefer soft, bright, or moody lighting
- how much negative space you like
- the way you arrange props
You don’t need rigid rules, just gentle visual cues that quietly tie your images together.
Final Thoughts
Great photos don’t rely on expensive gear or complicated setups. The heart of embroidery photography is simple: gentle light, a clean background, thoughtful styling, and honest editing. With a little practice, you can capture the richness, detail, and heart behind every stitch.